Running Elk on your computer#
In this guide you will quickly see which the first steps are, to run a plugin from within Elk’s Sushi host, to get sound playing out of it, and to control its parameters using an Open Sound Control (OSC) GUI.
IMPORTANT: All the below instructions and example files, are written for the context of running on a macOS or Linux desktop environment, not our development boards, for which the paths, binary files and command line arguments will differ. Refer instead to our instructions for running on the boards.
Running a plugin within the Sushi host#
You can run Sushi natively on your own macOS or Linux computer, or on a Linux virtual machine.
We provide binary releases that pack prebuilt Sushi binaries, the MDA plugins suite in VST3 format and some example JSON configurations.
Download the binary package for your system (Linux-x86_64, macOS-arm64 or macOS-x86_64) from the Sushi’s Github releases page.
Unzip the archive wherever you prefer
Running Sushi on macOS#
If you downloaded the release .zip file from a browser, you’d need to clear the quarantine bit by doing this on the extracted sushi folder:
$ xattr -rc sushi
To output sound to your soundcard, you can use the PortAudio frontend, which will internally use the system’s CoreAudio devices. Simply run Sushi with:
$ ./sushi -a -c config_files/play_vst3.json
By default, this will use the system’s default sound device. If you want to specify a different one, you can do that with the --audio-output-device flag.
Sushi will connect by default to the first available MIDI input device on the system, if present. If you want to use a different MIDI device, you need to change the rt_midi_device field in the Sushi’s JSON config file, as explained in the Sushi’s configuration format document.
Running Sushi on Linux#
The preferred way to connect to your soundcard on a Linux computer is through the JACK audio system. You need to have Jack audio configured on your computer, which is beyond the scope of this guide - but if you have trouble getting it working definitely ask us on the forum and we’ll do our best to get you going! We here show how use Cadence and Catia for managing Jack, but you can use any other tools you prefer in their place.
Simply run the bundled AppImage with:
$ ./Sushi-x86_64.AppImage -j --connect-ports -c config_files/play_vst3.json
You should see the following status message if everything is fine:
SUSHI - Sensus Universal Sound Host Interface
Copyright 2016-2022 Elk, Stockholm
Sushi should also appear as an audio device in your Jack configuration software - see the Catia screenshot below for an example:
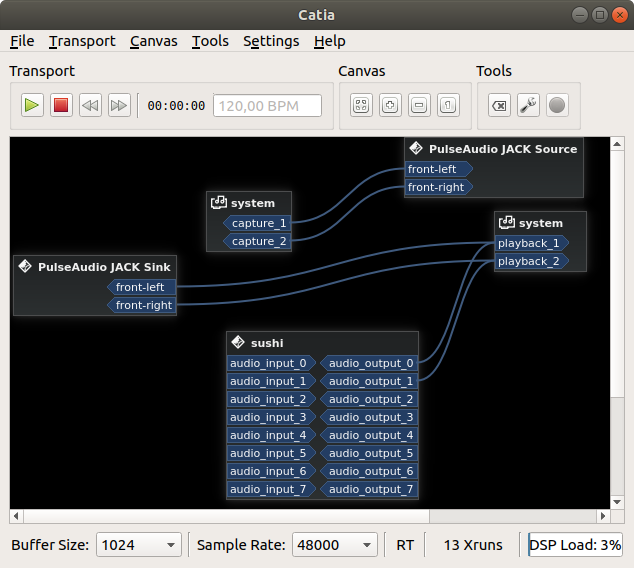
Note that its outputs are already connected.
Note that its outputs are already connected.
That is because the –connect-ports command-line option used, attempts to connect the Sushi outputs. If they are not connected after running Sushi, you need to make these connections yourself, or you will not be able to hear any sound.
Connecting MIDI to Sushi on Linux#
Now, although Sushi is successfully running and hosting the MDA jx10 vst3 synthesizer plugin, you will need to connect it to a MIDI device to be able to play sound. For this, connect them with the aconnect tool:
Start a new terminal window than the one where Sushi is running.
Type ‘aconnect -l’ to list all available MIDI devices and ports for connections:
client 0: 'System' [type=kernel]
    0 'Timer           '
    1 'Announce        '
client 14: 'Midi Through' [type=kernel]
    0 'Midi Through Port-0'
    1 'Midi Through Port-1'
    2 'Midi Through Port-2'
    3 'Midi Through Port-3'
client 24: 'UA-22' [type=kernel,card=2]
    0 'UA-22 MIDI 1    '
client 28: 'Launchkey MK2 25' [type=kernel,card=3]
    0 'Launchkey MK2 25 MIDI 1'
    1 'Launchkey MK2 25 MIDI 2'
client 128: 'Sushi' [type=user,pid=20167]
    0 'listen:in       '
    1 'write:out       '
The output you see will vary depending on your configuration, you should take note of the port number X for your MIDI controller (e.g. 28) and the one Y assigned to Sushi, here 128.
By typing aconnect X Y, or in this example aconnect 28 128, you should now hear sound when playing on your keyboard.
Tip: If you do not have a physical keyboard available, you can use the Virtual MIDI Piano Keyboard software (VMPK).
Control MDA JX10 VST3 plugin parameters#
If you want to do more on your synthesizer instance, e.g. changing some run-time parameters, SUSHI exposes everything that you need using both OSC or gRPC APIs.
Using the gRPC API gives you the greater flexibility and performance but as that is it’s a more of advanced topic, it’s covered in a dedicated section.
For OSC, we’ve prepared some configuration files that can be used with popular applications in our elk-examples repository.
Control MDA JX10 VST3 plugin with Open Stage Control#
If you do not know what Open Sound Control (OSC) is, it is helpful (but not mandatory) if you first read the article on the Elk Tech blog, dedicated to the topic.
Download and install the free Open Stage Control application to your computer.
Upon starting it, you will see the screen below. Here, all you need to do, is enter the IP and Port number, as is displayed under ‘send’ below. If you run the software on the same computer as you run Sushi, the IP should remain 127.0.0.1, and if you have not changed the Sushi default configuration, Sushi’s Port should remain 24024.
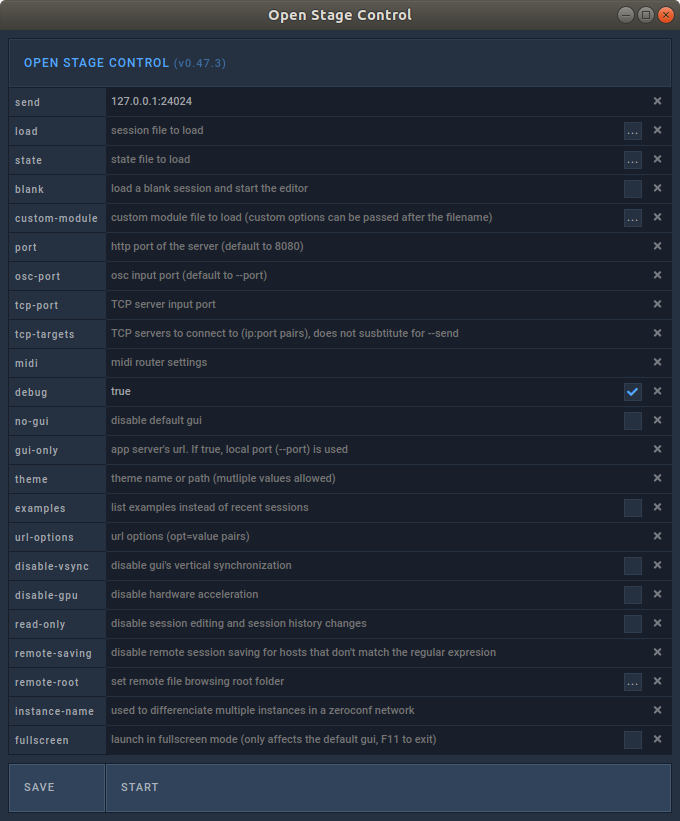
Click Start, and subsequently ‘Browse…’, to navigate to the path where “mda_jx10_vst3_open_stage_control_gui.json” is available.
You will now see the GUI below for controlling the jx10 synthesizer:
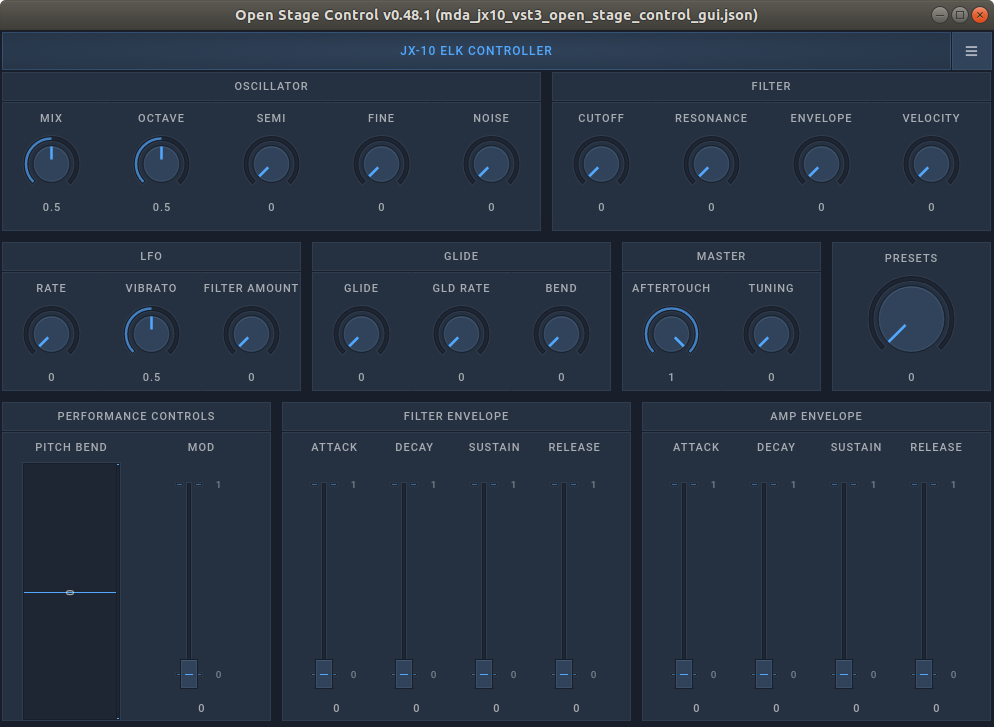
Assuming everything is correctly configured, the controls on the screen will send OSC messages to to the jx10 synth via Sushi, altering its parameters.
For example, dragging the knob ‘Resonance’, will send the point value of the knob to the OSC address ‘/parameter/jx10/VCF_Reso’.
‘jx10’ is here the name given the plugin in the Sushi configuration file.
Note: If you choose to change that name (’jx10’), the Open Stage Control template is easily updated by enabling editing, clicking on the “JX-10 ELK CONTROLLER”-title, and then, in the ‘osc’-section of the editor, setting the ‘address’ field to “/parameter/your_synth_name”, instead of the current “/parameter/jx10”.
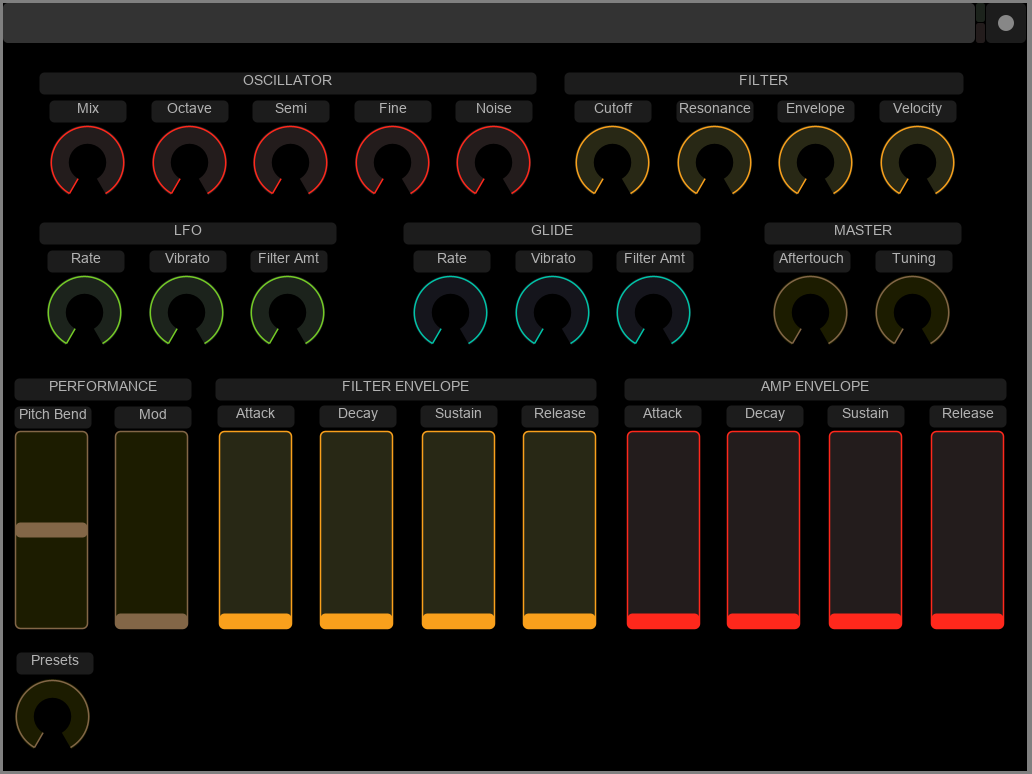
Control MDA JX10 VST3 plugin with TouchOSC#
If you would prefer to control your plugin from an iPad/Android tablet, we have also created an example GUI using the TouchOSC software - the file named mda-vst3-touchosc-gui.touchosc.
To use it, please refer to the TouchOSC manual - the only customisation needed is setting the IP-address that your computer running Sushi is using, in your TouchOSC app’s settings.
Which OSC messages your particular configuration responds to, can be accessed by running Sushi with the –dump -plugins flag, as detailed in our detailed documentation for Sushi.
Parameter values are in Sushi normalized to the range 0.0-1.0, floating point, across plugins and formats.